 Ugo//Tutorials
How to Create iPhone Mockups That Actually Look Good
Most iPhone mockups look like stock photos from 2019. Here is what makes a good one, what to avoid, and how to build one in under a minute.
The problem with most mockups
You search "iPhone mockup", find a template, paste your screenshot, and the result looks like every other product page on the internet. Flat white background, a perfectly centered phone floating in space, no shadow, no depth, no personality.
The screenshot inside might be great. But the frame around it does nothing. It does not make your app look better. It does not draw the eye. It just says "this is a phone."
Here is what separates a good iPhone mockup from a generic one, and how to make one in about a minute.
What makes a good iPhone mockup
The right device model. If you are showing an iOS app in 2026, use an iPhone 16 or 17 frame. Older bezels date your visuals immediately. The specific color variant matters too. A dark app looks better in a dark titanium frame than a white one.
A background that supports, not competes. The background is there to give the phone context and depth. A gradient that picks up a color from your app, a macOS wallpaper, or a solid dark tone all work. A busy illustration or a generic stock texture does not.
Shadow and depth. A phone without a shadow looks pasted on. A subtle spread shadow or an underlay shadow scene makes the device feel physical. Adjust the light angle and intensity until it looks like the phone is sitting on a surface, not floating in a void.
Camera framing that serves the content. Centered and flat works for app store screenshots where readability matters. For landing pages and social, a slight zoom and pan to crop the top of the screen can draw attention to the hero section of your app.
Before and after
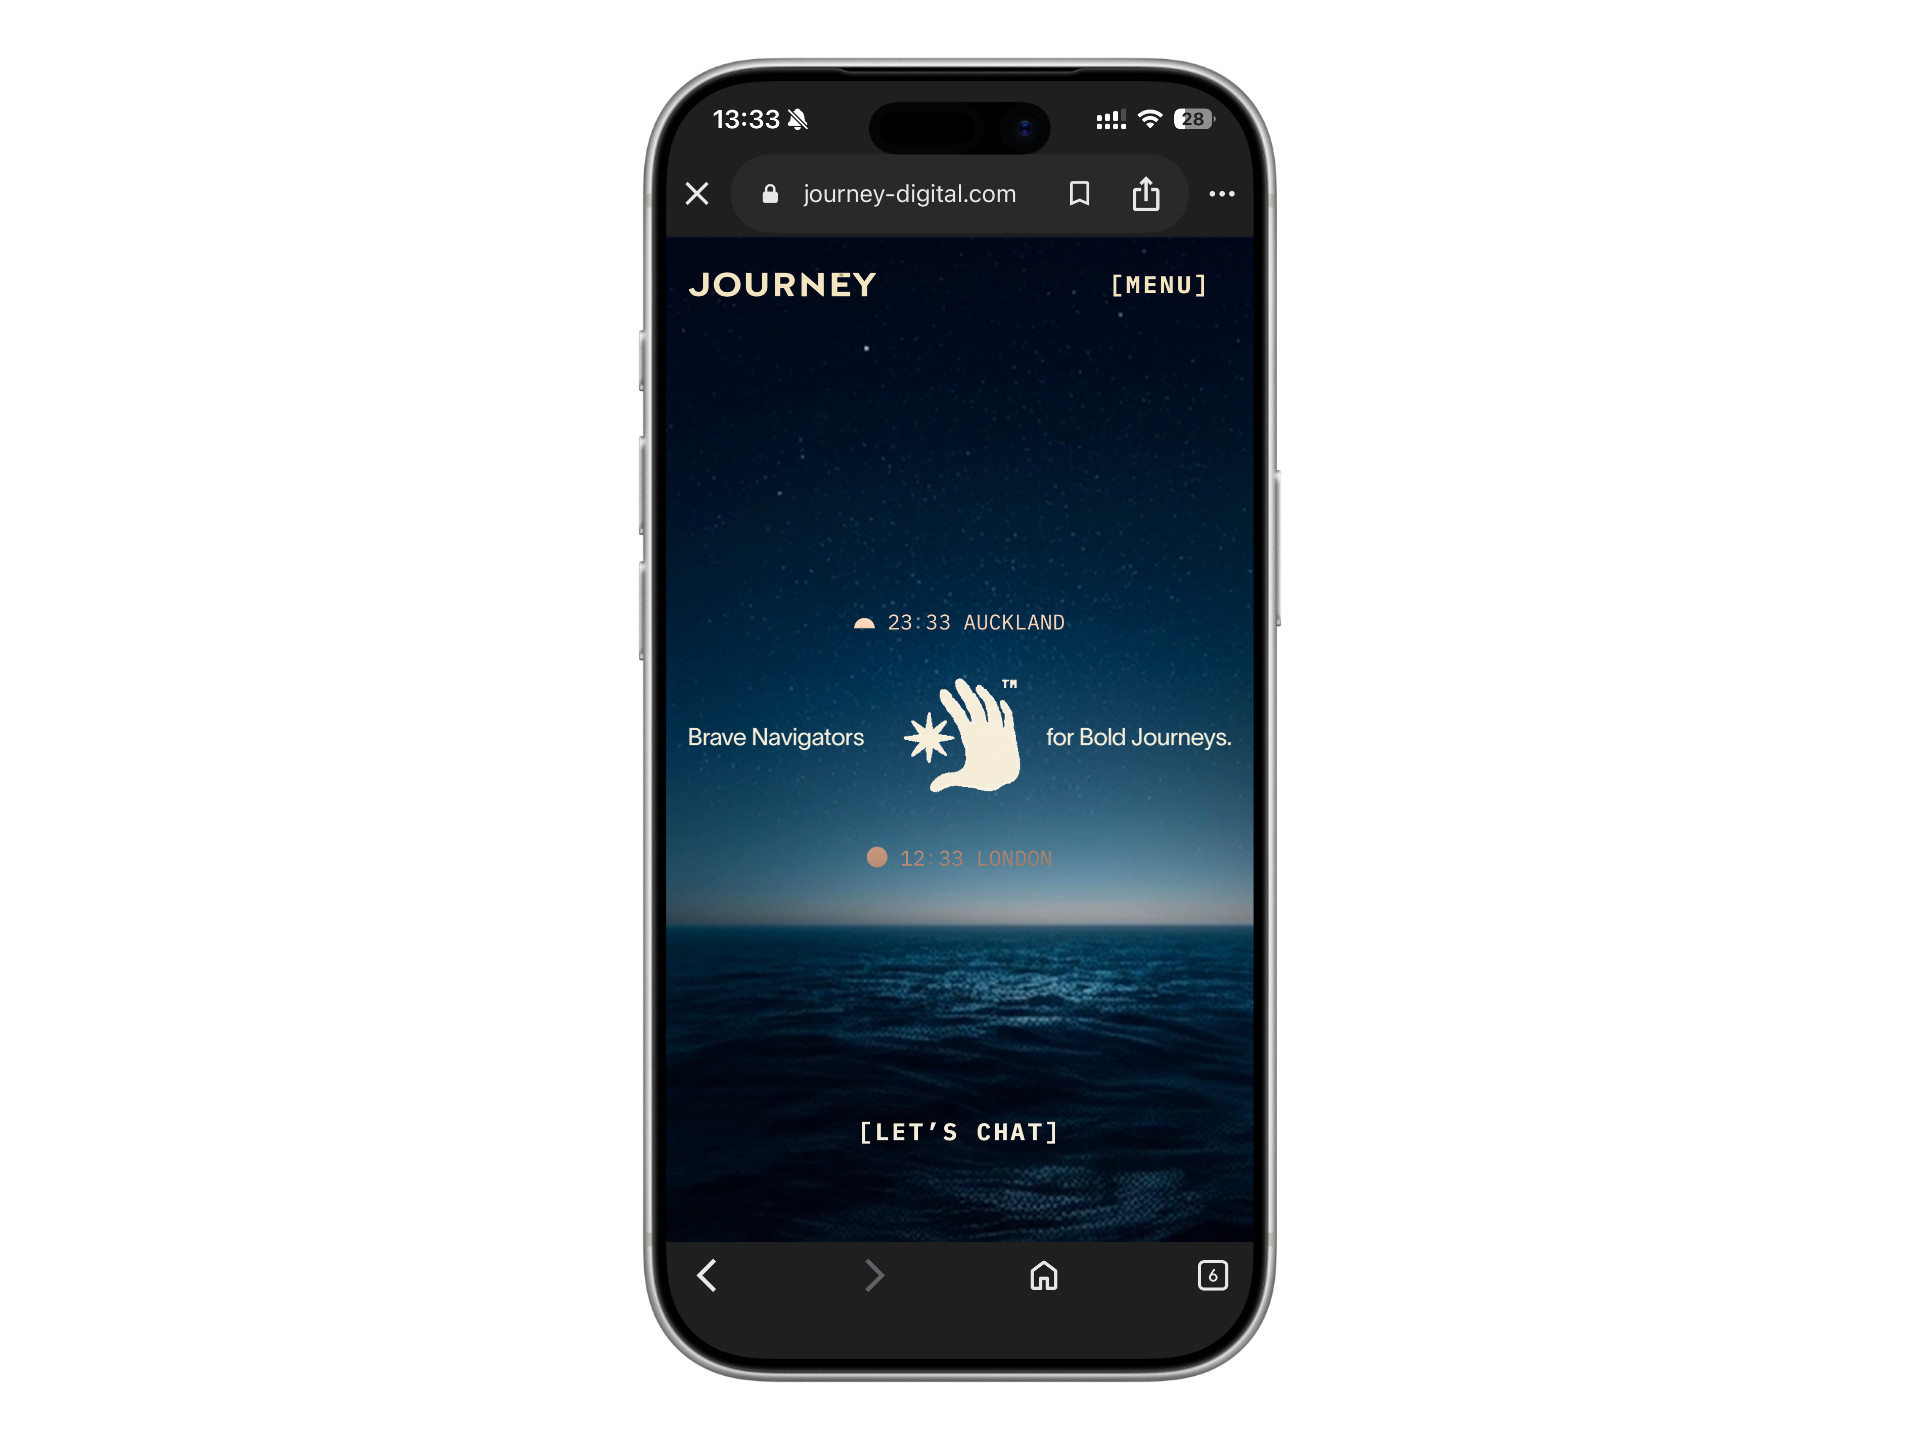
On the left: a raw phone screenshot with browser chrome, status bar, and navigation eating up the screen. On the right: two clean URL captures in a composed layout with background, shadow, and noise.
Before
After

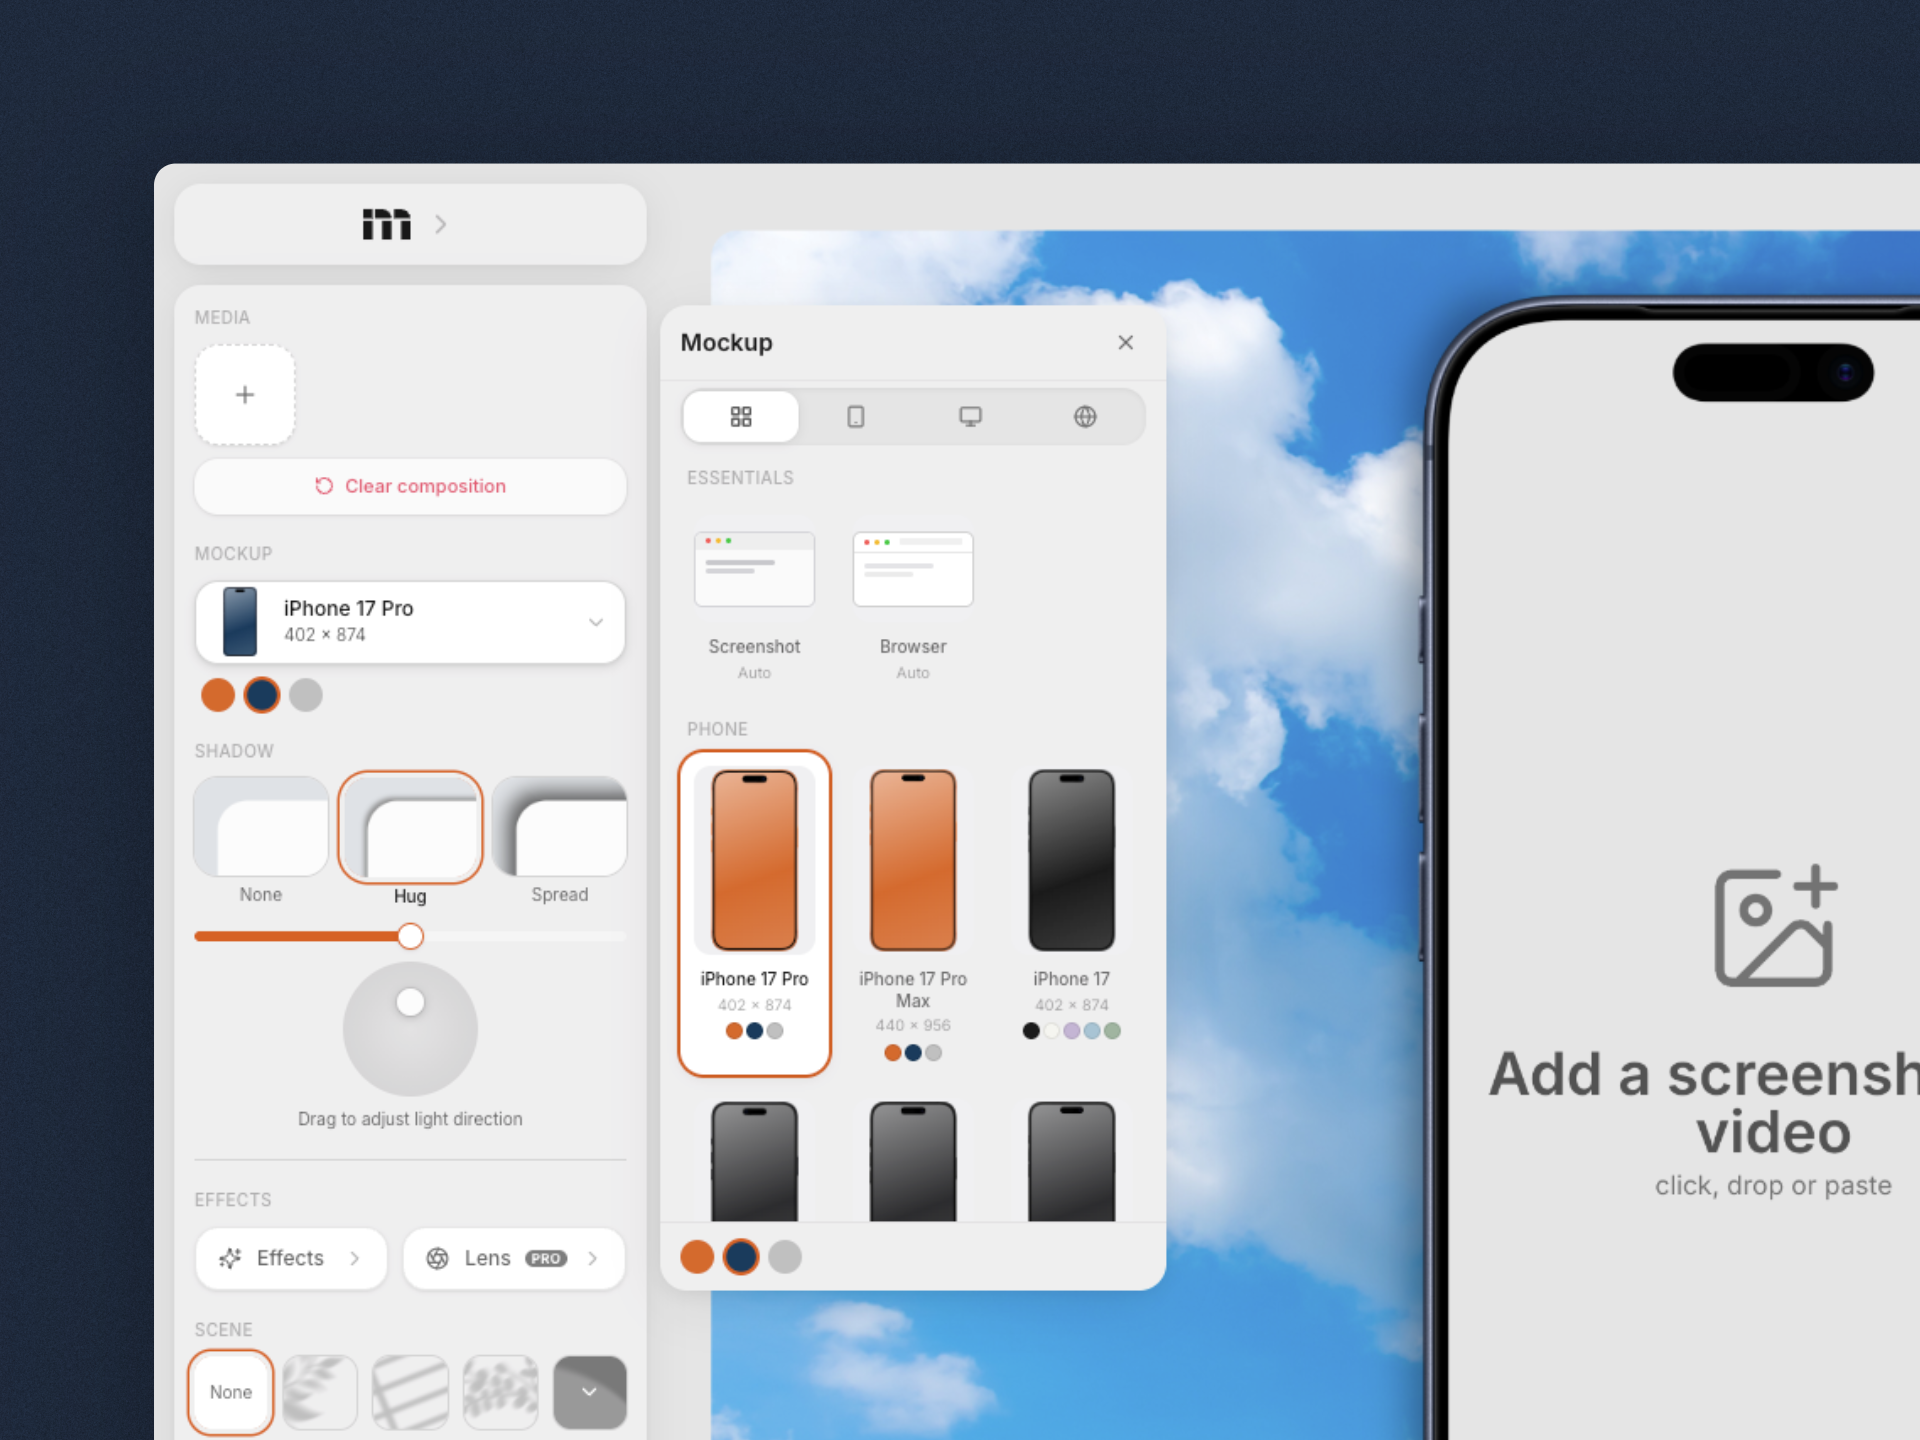
How to make one in Mokkit
Open Mokkit and drop your screenshot on the canvas, or paste it with Cmd+V. If you have a URL, switch to the URL tab in the media panel and paste it. The screenshot gets captured at the viewport size that matches your selected device.
Pick your iPhone model from the device panel. All iPhone 16 and 17 variants are available, each with their real color options. Switching between colors is one click.
Choose a background. The sidebar has gradients, macOS wallpapers, solid colors, or you can upload your own image. Pick a shadow preset (spread or hug), adjust the light angle, and you have depth.
Use the camera controls to zoom, pan, or rotate the composition. For a more dramatic look, pick one of the layout presets that offset or tilt the device.
Export as PNG, WebP, or JPEG. Free exports are watermark-free at 1x resolution. Pro unlocks 2x (4K) and 3x (6K), with a one-time pass instead of a subscription.
Phone screenshots vs URL captures
If you are mocking up an app, screenshotting from your phone is the way. You get the real UI, the real data, the real state. Drop that screenshot into a device frame and you are done.
If you are mocking up a website, do not screenshot it from your phone's browser. You will get the Chrome or Safari navigation bar at the top, the URL bar, the bottom tab bar, and sometimes a cookie banner. That is 15-20% of your screen wasted on browser chrome that has nothing to do with your product.
Use the URL capture instead. Paste your website's address in Mokkit's media panel, and it renders a clean screenshot at the exact viewport size matching your selected device. No browser bars, no status bar, no notifications. Just your website's content, pixel-perfect, at the right resolution. It also automatically removes cookie banners and chat widgets before capturing.
The before/after above is exactly this difference. The "before" is a phone screenshot with all the browser clutter. The "after" uses URL captures for both phones, producing clean, full-screen renders that show the actual product.
Which iPhone model to pick
Mokkit has every current iPhone model with all their real color variants. The one you pick depends on what you are making:
iPhone 16 Pro Max or 17 Pro Max for hero visuals and landing pages. The larger screen gives your screenshot more room to breathe and looks more impressive at scale. Pro Max frames are the standard for marketing mockups.
iPhone 16 or 17 (standard) for social media posts and blog images where the mockup sits alongside text. The smaller frame takes up less space in the composition and leaves room for context.
iPhone 17 Air for a thinner, more elegant profile. Works well when the mockup is part of a minimal, design-forward layout.
The color variant matters too. Match it to your app's palette: dark apps look better in dark titanium or black frames, light apps pop in white or natural titanium. You can switch colors with one click in the device panel.
Three mistakes that make mockups look amateur
Tilting a text-heavy screen. If your app shows a list, a form, or any dense text, a dramatic angle makes it unreadable. Save the tilt for hero sections, login screens, or visuals where the content is large and graphic.
Clashing background colors. A warm-toned app on a cool blue gradient feels off. Pick a background that either complements your app's palette or stays neutral (dark gray, warm sand, blurred wallpaper).
Exporting at 1x for retina screens. If your mockup ends up on a website or a pitch deck viewed on a MacBook, 1x will look blurry. Export at 2x minimum. On Mokkit, Pro gives you both 2x (4K) and 3x (6K).
Static vs animated: when to use each
Static (PNG/WebP) is enough for blog posts, documentation, pitch decks, and App Store screenshots. It loads instantly, works everywhere, and is easy to drop into Figma or Notion.
Animated (MP4) sells better on landing pages, Product Hunt gallery images, and social media. A slow zoom into the screen, or a transition between two states, makes the viewer stop scrolling. On Mokkit, you build animations with a keyframe timeline where you control each transition's easing and duration.
See also: How to turn any website into a mockup · Mokkit vs shots.so · Mokkit vs PostSpark
Related
Paste a URL, pick a frame, export. No screenshotting, no cropping, no Figma. Here is how to create website mockups that look like you hired a designer.